18 Apr How to Prepare Your Garage for EV Charger Installation
Electric vehicles (EVs) are becoming a common sight on the roads of Salt Lake City, and for good reason. The shift from gas stations to charging stations represents a new era of convenience and sustainability. However, one of the biggest questions new EV owners face isn’t about range or horsepower—it’s about where and how to charge their new car at home. While public charging infrastructure is growing, the ability to “fill up” overnight in your own garage is the ultimate game-changer for EV ownership.
Transitioning to an electric vehicle involves more than just driving it off the lot; it requires ensuring your home’s electrical system is ready to handle the load. Many older homes in Utah weren’t built with high-voltage car charging in mind. A standard outlet might give you a few miles of range overnight, but for daily driving, you likely need a more robust solution. This means upgrading your garage’s electrical capacity is often the first step in your EV journey.
Preparing your garage for an electric vehicle charger installation might seem daunting, but with the right planning and professional help, it can be a smooth process. From assessing your current electrical panel to choosing the right location for your charger, getting your home ready ensures safety and efficiency. In this guide, we will walk you through the essential steps to prepare your home for a Level 2 charger, ensuring you wake up to a full battery every morning.
Assess Your Home’s Electrical Capacity
Before you even purchase a charger, you need to know if your home can handle it. Electric vehicles draw a significant amount of power—much more than a standard appliance like a refrigerator or television. Most dedicated Level 2 chargers require a dedicated 240-volt circuit, similar to what powers an electric dryer or oven. If your electrical panel is already maxed out with other high-demand appliances, adding a charger could overload the system.
This is where electrical troubleshooting comes into play. You need to determine the amperage of your main service panel. Older homes often have 100-amp panels, which might struggle to accommodate an EV charger alongside modern HVAC systems and appliances. Newer homes typically feature 200-amp panels, which are generally sufficient. If your current setup is insufficient, you may need a service upgrade or a “heavy up” to safely power your new vehicle.
Choose the Right Level of Charging
Understanding the difference between Level 1 and Level 2 charging is critical for planning your installation. This decision dictates whether you need simple changing electric outlets or a full wiring overhaul.
Level 1 Charging
This is the standard charging method using a common 120-volt household outlet. Every EV comes with a cord that fits into a standard three-prong plug. While this requires zero installation work, it is incredibly slow, adding only about 3 to 5 miles of range per hour. This might suffice for drivers who rarely leave the neighborhood, but for most commuters, it’s impractical.
Level 2 Charging
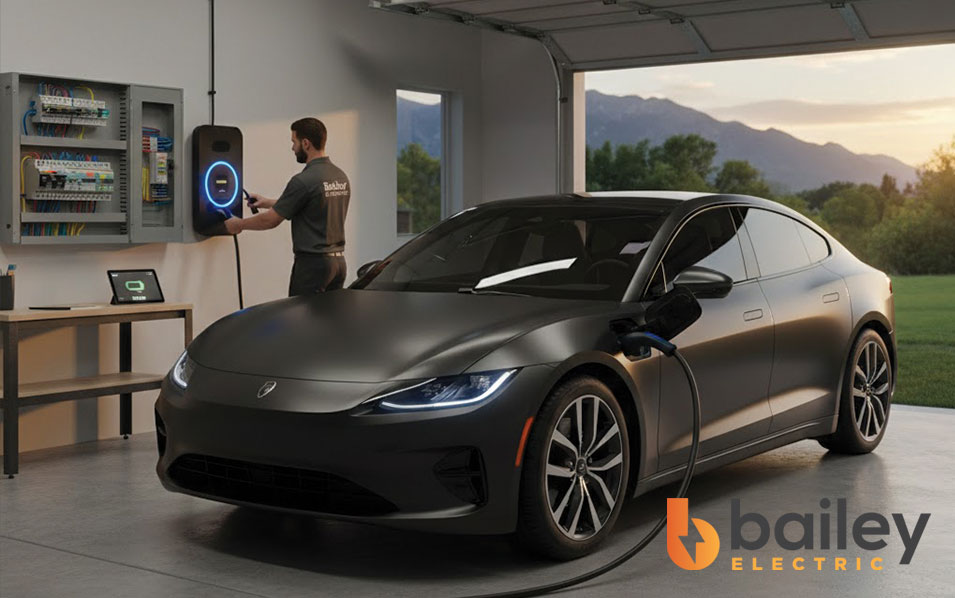
This is the standard for home charging. A Level 2 charger uses a 240-volt circuit and can charge an EV from empty to full in roughly 4 to 8 hours. This requires professional garage car charge installation. It’s the most convenient option, effectively treating your car like a smartphone that charges while you sleep. To achieve this, you will need a dedicated circuit installed by a professional electrician.
Determine the Best Location
Once you’ve decided on a Level 2 charger, you need to figure out where it goes. The location of the charger depends heavily on where the charge port is located on your vehicle. Is it on the front bumper? The rear driver’s side? You want to position the charger so the cord reaches easily without becoming a tripping hazard.
Consider the layout of your garage. You might need to clear space on a wall near the garage door or near where you typically park. Additionally, think about interior lighting. You don’t want to be fumbling with a heavy charging cable in the dark. If your garage is dimly lit, consider upgrading your lighting fixtures at the same time you install the charger to make the nightly plug-in routine easier and safer.
Review Your Wiring and Outlets
Installing a Level 2 charger isn’t as simple as plugging in a toaster. It requires running a new, heavy-duty line from your electrical panel to the charging location. If your panel is in the basement or on the opposite side of the house from the garage, this involves complex wiring and rewiring a home. The distance between the panel and the charger will affect the cost of installation due to the amount of copper wire and conduit needed.
In some cases, homeowners might want to install a NEMA 14-50 outlet (the same kind used for electric ranges) rather than hardwiring the charger. This allows you to unplug the charger if you move. However, this requires a specialized heavy-duty receptacle. Standard outlets from a big-box store often melt under the continuous load of EV charging. Professional residential electric services will ensure industrial-grade materials are used to prevent fire hazards.
Clear the Area and Prep for Installation
Before the electrician arrives, prepare the workspace. EV charger installation involves drilling, running conduit, and working with your main electrical panel. Clear the area around your electrical panel so the electrician has safe and easy access. In the garage, move boxes, bikes, or shelving units away from the wall where the charger will be mounted.
This is also a good time to consider other electrical upgrades. Since the electrician will already be working on your system, it’s cost-effective to bundle services. Do you need ceiling fan installation to keep the garage cool in the summer? Perhaps you need electrical repair on a flickering light or want to install smart switch installation capabilities to control your garage lights from your phone. addressing these needs simultaneously saves on multiple service call fees.
Safety First: Permits and Inspections
One of the most important steps in preparing for an EV charger is understanding that this is permitted work. Adding a high-voltage circuit to your home requires adherence to local building codes in Salt Lake City and Utah County. A reputable electrician will handle the permitting process for you.
Permits are not just red tape; they are a safety verification. After the installation, an inspector will ensure the wiring is up to code, the breaker is sized correctly, and the system is safe to use. Skipping this step can void your home insurance policy in the event of an electrical fire. Furthermore, ensure your circuit breakers repair or upgrades are handled professionally. An overloaded breaker is a primary cause of electrical failure.
Future-Proofing Your Garage
While you are upgrading your electrical system, think beyond just the car. The trend toward electrification is only accelerating. If you plan to add a second EV in the future, ask your electrician about sizing the wiring for dual chargers now. It is far cheaper to run thicker wire once than to rip out drywall and redo it in five years.
You might also consider other safety and convenience features. With a high-powered vehicle charging in the garage, ensuring your smoke & carbon monoxide alarm installation is up to date is vital for peace of mind. Additionally, if you spend time working in the garage on your car, upgrading your electrician for exterior lighting or adding motion-sensor floodlights outside the garage door can improve security and visibility.
FAQ: EV Charger Installation
Can I install an EV charger myself?
No, this is not recommended. Level 2 chargers operate at 240 volts and high amperage. Improper installation can lead to electrocution, fire, or damage to your vehicle’s onboard charger. Always hire a licensed professional who specializes in residential electric services.
Does my garage need to be heated for an EV charger?
No, but extreme cold can slow down charging speeds and reduce battery efficiency. While the charger itself works in the cold, the car may use energy to warm the battery. If your garage is detached or uninsulated, standard indoor lighting won’t add heat, but ensuring the space is weather-sealed helps.
How much does it cost to install an EV charger?
The cost varies significantly based on the distance from your panel to the garage, the need for a panel upgrade, and permitting fees. A simple installation close to the panel is affordable, while a complex job requiring wiring and rewiring a home will cost more. Contact Bailey Electric for a transparent quote.
What if I don’t have space in my panel?
If your panel is full, electricians have a few options. They can install a sub-panel, use “tandem” breakers to free up space, or perform a heavy-up service upgrade to increase the total amperage entering your home.
Get Ready to Charge with Bailey Electric
Preparing your garage for an electric vehicle is an exciting step toward a greener future and a more convenient lifestyle. By assessing your electrical capacity, choosing the right equipment, and ensuring a safe, code-compliant installation, you can enjoy the full benefits of EV ownership without worry. Don’t let old wiring hold you back from the latest automotive technology.
At Bailey Electric, we specialize in garage car charge installation and helping Utah homeowners transition to electric driving safely. Whether you need a simple outlet installation or a full service upgrade, we provide transparent pricing and expert workmanship. Contact us today to schedule your free quote and get your home ready for the road ahead.
Sorry, the comment form is closed at this time.